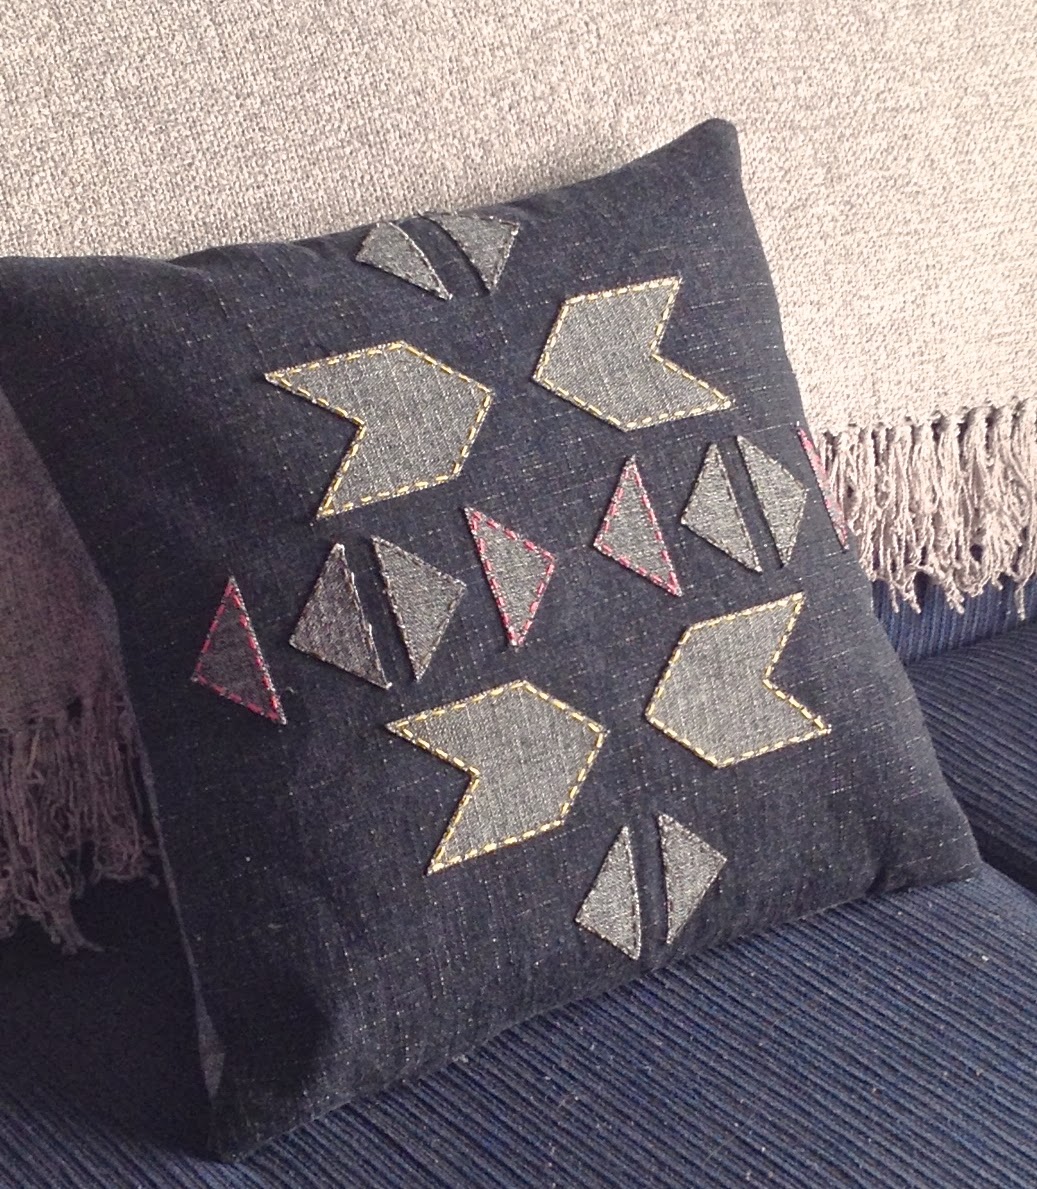
I know I'm not the only one that is trying to find ways to use up some of my ever increasing fabric stash... and when in doubt, why not make a new cushion! A little late in the piece, I've decided I need something geometric / Aztec inspired in my home, using up some old cross-hatch denim that was lying around...
What you'll need:
- Denim - about 60cm (or 2 x contrasting fabrics in a woven cotton of the same weight)
- Bondaweb (double sided iron on adhesive)
- graph or grid paper for easy drawing
- a chalk pencil / washable marker
- embroidery thread (optional)
- thread for sewing your cushion together
- a 25cm zip
To get started, cut out 2 squares of your fabric, to use as the base of your cushion covers, leaving a 1cm seam allowance on each side.
If, like me, you're using up scraps of fabric, which might not be exactly suitable for cushions, make sure your prepare your fabric accordingly. In my case, my denim has some stretch in it, so I'm adding fusing to the back. I've also decided that each side of my cushion is going to be in contrast colours, ie one side will use the right side of the denim, the other will use the reverse side of the denim... if you're doing the same, make sure you fuse the correct side of your fabric....
Also, if your cotton is quite a light weight, it would be worth adding some fusing to the back for a more durable cushion cover.
To get started on your appliqués make some of the basic shapes you want to use on your grid paper. I used this to map our some design ideas at the same time, which have then become my templates for my appliqués.
I my case, I use 12 small triangles and 4 of the larger arrow shapes for the design on each side of the cushion.
Cut a piece of bondaweb to fit your excess fabric, out of which you're making your appliqués. Iron this on to the wrong side of your fabric (again keeping in mind which side you're ironing this on to, if like me you're using both sides of the fabric as contrasting colours).
Cut out templates of your basic shapes from your grid paper and trace around these onto the bondaweb paper.
If you're following my design, that's 12 triangles in each colour and 4 arrows in each colour....
Cut out your shapes...
Until you have all the pieces ready...
Lay out your design and make sure you're happy with it...
This is the design I've decided on:
You can see from the above that everything is slightly off kilter and it really is obvious when you're design is a symmetrical one, so take the extra time to measure it all up.
The easiest way to do this is mark horizontal lines (to which you can match up the triangles and arrows point to point) and 2 central vertical lines, to ensure all rows line up evenly. You're also going to mark the points where each triangle edge or point is going to sit, as shown by the red dots in the image below:
I allowed for a 1cm space down the centre of the pattern and 5mm between each (horizontal) row of shapes. I also left 5mm between each of the triangles in the centre horizontal row.
This can seem a bit daunting... but it's not too bad once you get started. So, start by marking up the central horizontal axis (that your line of small triangles will be centred along). Then the two vertical lines...
Then final the points between each shape....
This definitely isn't the most fun part of the project, but worth the extra effort...
It's going to end up looking like this:
Repeat for with your other piece of fabric (ie the other side of the cushion cover).
Start laying out your pieces, starting with the central most pieces. I also marked the halfway point on the long side of each triangle to make lining these up even easier.
Once you're laid out all of your pieces, it will look like this...
Being careful not to move your pieces, remove the paper side of the bondaweb and iron your appliqués to set them in position...
Rub out the chalk marks and then repeat this process for the other side of the cushion.
At this point there is an opportunity to add a little extra embellishment should you wish to, which I'm doing by stitching around my shapes in a contrasting embroidery thread. I've split a standard 6 strand in half (i.e. into 3 strands) to do this. The added bonus is that you'll have no issues if your bondaweb comes undone at all with wash and wear...
This doesn't take long... just a minute or so per shape...
Give both pieces of fabric a press and then it's time to insert your zip. I
've chosen to use an invisible zip (despite the quite heavy fabric I'm using) simply because it's what I had lying around, but you could just easily use a dress zip...
If you're not sure how to put your zip in, follow the instructions on the pack. Take care that you position your two sides of the cushion correctly, so that the direction of the pattern is the same on each side. I want my zip at the "bottom" of the cushion. I then sewed the seams 5cm in from the corner on the side I wanted to put my zip in (the open space in between becomes your zip opening), before adding the zip. Once you've attached the zip lie the piece flat, as above and press on the outside...
Then, match up the 2 sides of your cushion (right sides together) and sew right around the edges. Mitre the corners (ie trim the corner edges off as shown below - be careful not to cut your stitching)...
Turn your cover the right way out, fill with your cushion insert and you're done!
I hope you enjoy making this and would love to see your results!
Labels: appliquéd cushion, aztec, cushion, DIY, DMC embroidery thread, easy project, embroidery, geometric, pattern using DMC embroidery thread, sew, tutorial