I'm super excited about this little project... it's one of those ideas that feels like a complete brain wave... what's more, pretty and practical...
I'd been looking around for some jewellery solutions for a while and this is definitely one of the best I'd found, from the Elli Blog... I love the warm linen colour she's used...
But the thought of finding a frame was a little daunting...
Then I remembered these lovely little guys that I'd seen at the Purl Bee.
Put these two together and you get my new project:
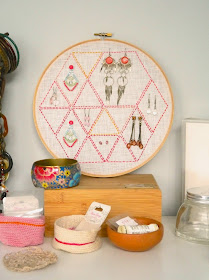
the DIY Embroidery Hoop Earring Holder...
meets wall art.
An embroidery hoop
A ruler (and some patience to use it)
a chalk pencil
some open weave fabric, like linen (that you're earrings can thread through with minimal effort)
cotton in a dark colour
a needle
assorted embroidery threads in colour theme of your choice
scissors
glue
To get started look at some different shapes that could be used as a kind of mosaic of shapes... obviously there's heaps of flexibility here so whatever goes... (not all of your shapes need to be the same, if they can fit together... see my example further down this post)...
My plan is to do 2 or 3 in different colour themes... To start with though, I've gone with the triangles idea above (I was feeling a little inspired by this stunning case at Karen Barbé).
Put your fabric into your hoop and trim it to about an inch around the edges. I am embroidering just inside the lines I'm going to mark up. I started with a few marks in my chalk pencil, but quickly switched to using a basting stitch to mark these out - first marking out the horizontal lines..
Then going on to the diagonal lines (my hoop was 22cm and my triangles 5cm deep, with each side being 5.6cm long)...
Now colour...

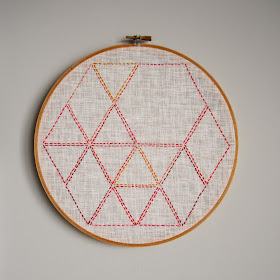
I've gone with a bright & warm palette: deep wine red, warm red, scarlet, bright orange, coral, pale peach and a warm yellow..
I halved my embroidery thread (using just 3 strands), for a fine stitched line.
Start more or less in the middle, so you can balance colour placement as you go...
Use a short running stitch (mine are 2-3mm long and 1-2mm apart - I'm not being to exact...). I stitched abut 1mm in from the basted stitches.
If your fabric is slightly transparent like mine, keep the ends on the reverse side tidy - I stitched back over the tail as I started each triangle.
It was after the first few triangles that I'd stitched that I realised I could mix up my shapes (to fit some of my danglies as well!), so don't feel too limited by your shapes, if you can combine them to make new shapes... in my case I added diamonds and hexagons to the mix...
Before you know it, you'll have completed your stitching and you can remove the basting threads... here's how mine looked:
To finish it off, flip it over and cut in towards the hoop at rough intervals, to help make folding it inwards a little easier...
Then take your glue, apply it around the inner wooden rim and tamp down your fabric over the top. I used a toothpick to save myself from messy fingers...

Once your glue has dried, trim away the excess fabric....
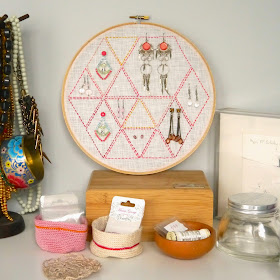
Add your favourite earrings and you're done!
Hang it above your dresser, or lean it against the wall... either works well and with easy removal, it's no problem to use this for your favourite studs either...
Hope you like it! Next I'm thinking blues and greens...


Wow this is such a fantastic idea! I think I might have to try it--I currently have a lot of earrings stuffed into boxes, when clearly they could be displayed so much more prettily. :) Thanks for sharing!
ReplyDeleteThanks Maia - glad you like it :)
ReplyDelete